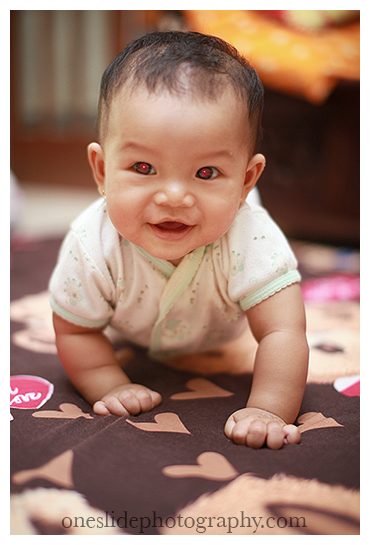
There are most likely times you encounter red eyes on your models in your results when you photograph. This, in the world of photography, is known as the “red eye effect.” This is a common phenomenon that occurs because the light from the flash reaches the blood vessels behind the retina of the eye and would then be bounced off and captured by the camera lens. Simply put, it’s related to how the light from the camera flash bounces off the eyes.
The amount of light that reaches the retina is controlled by the pupil. When light received is bright, the pupil will dilate smaller so no excessive light will come through. On the other hand, if the pupil receive dim lighting, the pupil will widen to allow as much light into the retina. Between the retina and the sclera (the whites of the eye) is a layer of tissues called choroid that’s red in color.
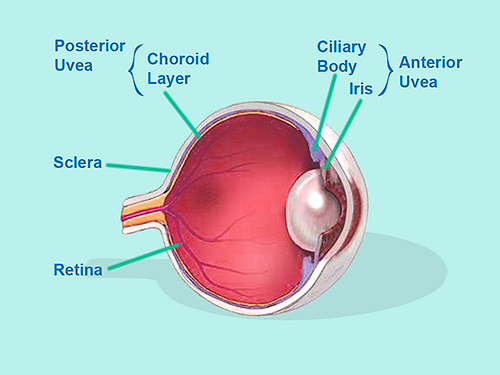
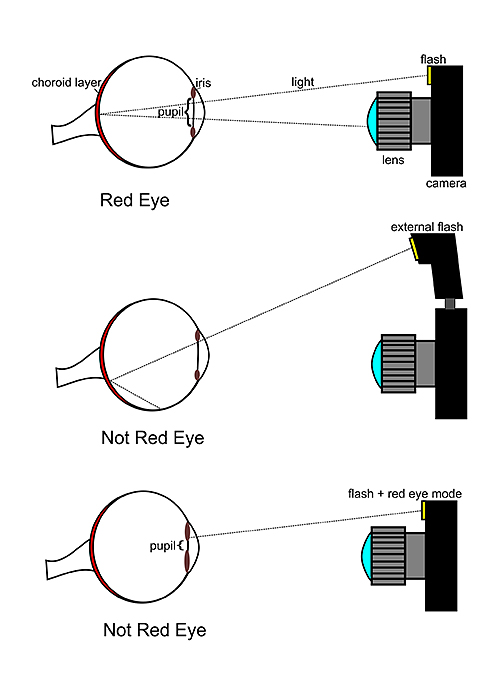
When light from a flash goes off, the pupil doesn’t have enough time to dilate so most of the light bounces from the choroid surface. Because there’s a lot of blood on the choroid, the bounced light is then reflected onto the camera lens as the color red. Because the angle of light going into the eye is the same angle as the light reflecting off the eye, the close the flash is to the lens, the bigger the chance the reflected light will be captured by the lens and appear as the color red. Also, the darker the environment, the bigger the chance this “red eye effect” phenomenon will occurs.
Detailed explanation is in the image below:
Children have a higher likelihood of cause the red eye effect. This is because in a low light intensity, children’s pupil will grow wider more quickly than adults.
Tips to lessen the red eye effect:
1.Use the “Red Eye” feature of your lens. This feature will trigger a second or several flash bursts before the shot is taken. Flash triggered before the shot shrinks the pupil of the eye, decreasing the red eye effect.
2.Position the flash distant from the lens. This can be done by using an external flash or by using the strobist (off shoe flash) technique using a wireless trigger.
3.Photograph in conditions with sufficient lighting.
4.Use post-processing softwares to remove red-eye. In actuality, these red-eye removal softwares are only removing the color red by changing it to grayscale.
