Now days many digital cameras have a mode on them called ‘bulb’ mode that allows you as the photographer to keep the shutter open as long as you wish. This can be very handy in this type of photography to time your shots with precision. If you use this you’ll want to be using a remote shutter release to stop any camera movement while the shutter is open. Put simply, it’s a technique of photography where the lens of the camera is left open for long enough to capture something not usually seen by the naked eye.As far as I can tell there is no official “minimum length of time” after which a photo is officially a “bulb photo”.
Tips for taking nightscapes
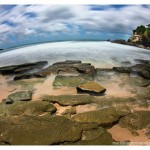
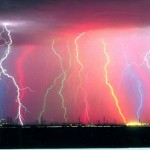
Here is what I learned from experimenting with long exposure nightscapes.
* Always use a steady tripod and remote release. Obviously you won’t be able to hold a camera steady enough for 8 minutes without them. It’s also a good idea to use a remote release that will allow you to hold the exposure open for as long as you need. Therefore it’s important to buy a model that has a shutter release lock.
* You need to set your SLR camera to BULB. This will enable you to keep the exposure open for longer than 30 seconds.
* Try an exposure of 3 minutes to start with, then give or take a few from there depending on how dark it is. Note: Your camera will take just as long to process the image afterwards. Therefore if you take the photograph over 3 minutes exposure, the camera will actually take 6 minutes to complete the shot.
* Turn on your camera’s noise reduction setting (if it has one). Long exposure night shots are known for high noise. Therefore you will most likely need to use noise reduction software on the final image. I used Photoshop CS2 to reduce the noise in the two examples shown above.
* Some photographers will tell you that increasing your ISO setting will reduce the time required to take a nightscape. However, I find this causes high noise that will be seen in the final image. Hence I recommend keeping it to 100 or as low as your camera will allow.

Camera Settings:
* Aperture and Shutter Speed – I wish I could give you shutter speeds and apertures that will work in every situation – but as the ambient light and speed of cars will differ in every situation there’s no one exposure combination that will work in every setting.
Having said this I’ve found that I usually shoot at shutter speeds between 10 and 20 seconds (which gives cars time to move through the frame) and with apertures in the mid range (start with something around f/8).
The key is to start with something in the range above and to take a few test shots to see how the exposure works. You’ll quickly realize whether your shots are under or overexposed and whether the length of the exposure is long enough to let cars travel through the frame in the way that you want.
If your shots are overexposed – close your aperture down (increase the f stop number) or if your shots are underexposed open it up (decrease the f stop numbers). If you want the car’s lights to go further through the frame go for a longer shutter speed and if you want it to travel less through the frame shorten it.
Keep in mind that aperture impacts depth of field. If you need to go with a larger aperture you decrease the depth of field and more of your shot will be out of focus.
* Choose a low ISO setting – this will give you images with as little noise as possible.
* Shoot in RAW if you have it – this will enable you to have more control in your post production work – particularly in getting white balance right (something that can be important as you’re shooting in a situation with lots of artificial light that can cause all kinds of color casts in your shot).
* Manual Focus – In low light situations cameras can struggle to get focusing locked correctly. The last thing you want is for your camera to be in and out of focus just as you need to hit the shutter release. Switch to manual focus and make sure your focus is upon a part of your image that is visually strong.
The most important thing to remember when taking nightscapes, is that you need to be patient. When each photograph takes at minimum 10 minutes to complete, you need to be prepared to be in for a long night. After taking a few under or over exposed shots, or wobbly ones where a gust of wind blows at the wrong moment, you might end up with a keeper.

[via][via]