Landscape photography are usually accomplished using a wide angle lens. But what if all you have is a telephoto lens but you want to capture a wide landscape shot?
No worries, this tutorial will show you how to create a landscape photo using Adobe Photoshop CS6. The main point is to compile a number of photos into one panoramic photograph. With these steps you’ll be able to create an extra wide panorama even though you captured your photographs using a telephoto lens (in the following example, the photos were taken using a 105 mm Nikkor lens).
Here’s what you have to do:
– Shoot your photos in sequence.
This is the most crucial step. You have to taken your photos in order. It can be from left to right, top to bottom, or the other way around. The important thing is when you photograph, the 1st photo and the 2nd photo (and so on) need to be able to overlap and there can’t be any gaps in between the shots. It’s best to use a tripod when shooting the series.


– Use Manual Mode.
The manual mode is very important in order to get an even exposure and white balance in the photos that’ll be compiled. Use the same settings in every photo. Also use manual focus and choose one focus point before taking the series of photos. In the example, I used the mountain as my focus point.
– Prepare the photographs.
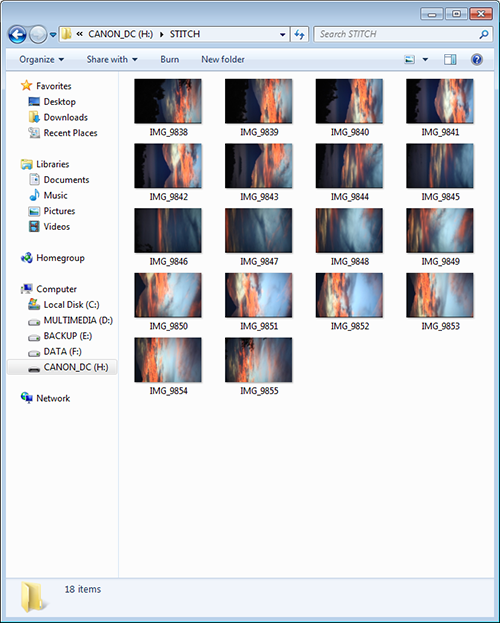
After done with the photographs, it’s now time to work with Adobe Photoshop (here, I’m using the Photoshop CS6). Put the photos you’re going to work with into a single folder to ease the process. Separating them means there’ll be no chance they’ll get mixed up.
Steps on the Photoshop CS6:
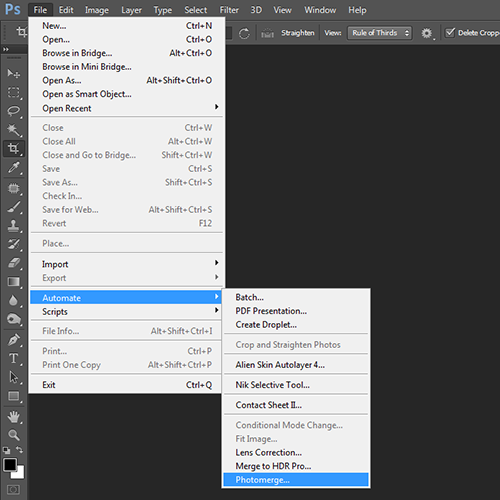
1. Go to FILE ? AUTOMATE ? PHOTOMERGE
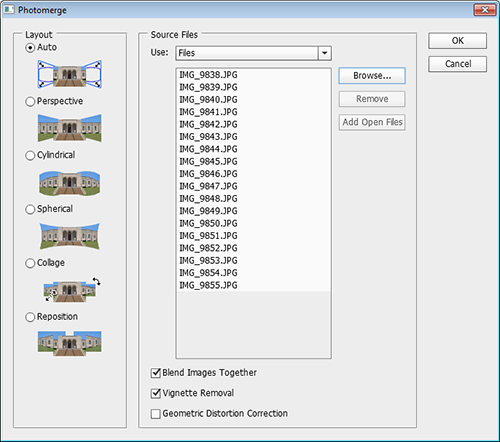
2. BROWSE and select all the photos that’ll be merged. Choose AUTO in the Layout option and tick on the “BLEND IMAGES TOGETHER.” This serves to make the transition between the photos more refined and make them appear whole and together. Then tick the “VIGNETTE REMOVAL” to eliminate the vignette on the photos so it will be easier to put together.
3. After clicking OK, you will have to wait until the process is complete.
4. Once the process is completed, press CTRL + E to merge all the photo layers into one layer.
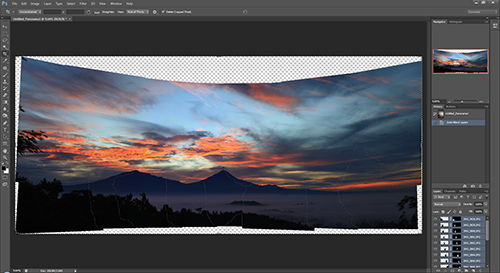
5. After all photos are merged, there’ll be white areas surrounding the photos. You can easily crop them out.

For a more detailed explanation, see the video tutorial below: