Selective color photography is a photography technique where the resulting photos will have a few prominent colors against a black and white background. The following is tips and tricks to achieving a selective color photograph using adobe photoshop. These steps are simple, and can be done by even the most novices in digital editing.
1. Open the colored photo to be process in Photoshop.

2. Click Layer >> Duplicate Layer
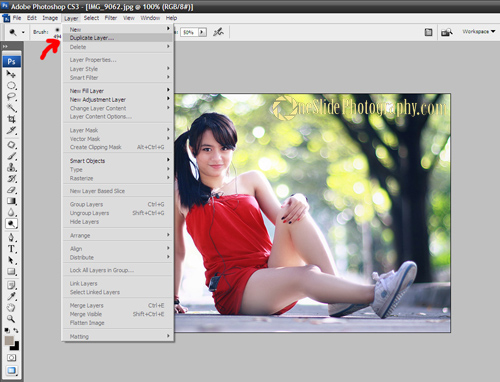
3. There will then be a “background copy” layer in the layer window.
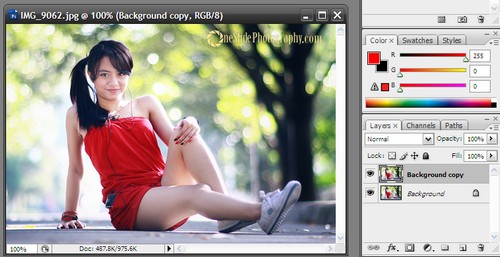
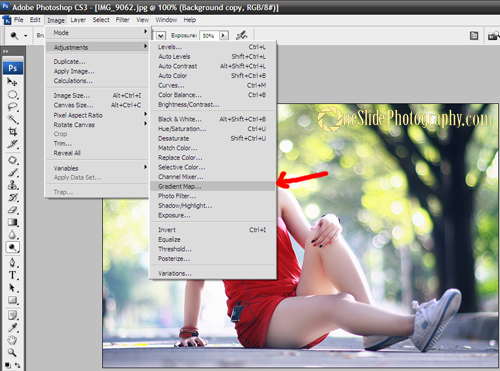
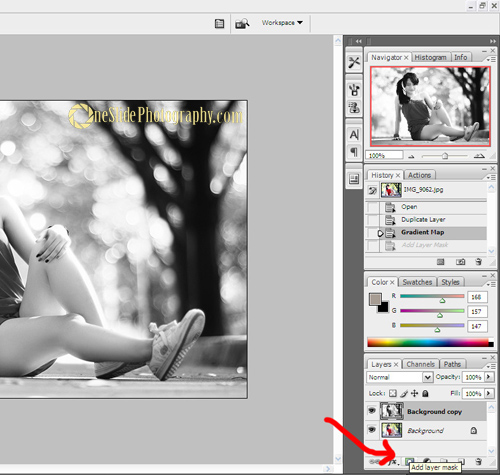
4. Change the “background copy” to black and white. Here I use ‘gradient map” to change the image to black and white. (image >> Adjustments >> Gradient map…)
5. Now, add a masking layer to the background copy. The “add layer” button is on the bottom part of the layers window.
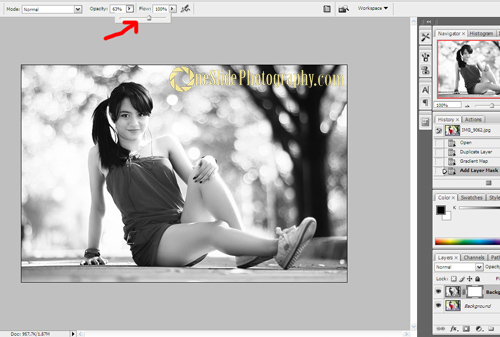
6. Use the “brush” tool and set the opacity as necessary. Here, I use 47% as the opacity setting. The black brush is used to erase any parts of the “background copy” layer, while the white brush returns any erased section. Erase any unwanted black-and-white effect of the “background copy” with the black brush. Use the zoom tool for higher precision when brushing over any borders.
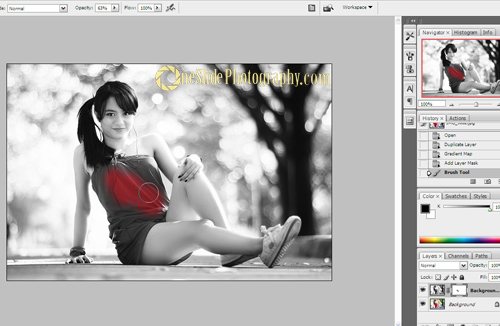
7. After the masking is done, it should look like this:


