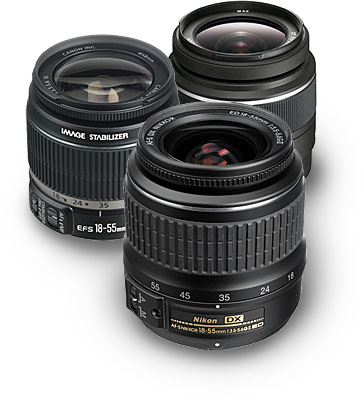
First, I would like to explain what a “kit” lens actually is. A kit lens is a lens that is usually bundled in the package when buying a new DSLR camera. For beginner DSLR kits, the kit lenses bundled in are also beginner lenses and cheap in price. But if you have the opportunity to buy an advanced camera such as the Canon 5D mark II, the lens bundled is also advanced. For example, 5D mark II is bundled with the Canon 24-105mm f/4 L USM that’ll cost over $1000 separately.
So if the assumption was that the kit lens is always a cheap and low quality lens, this isn’t necessarily true. But it is undeniable that most kit lenses are low quality and cheap.
Currently, camera and lens manufacturers have upgraded the quality of the kit lens. And if compared with the quality set 3 to 5 years ago, the photographs produced by kit lenses are getting better with a more flexible zoom range.
The difference between cheap and expensive lenses
So how do you maximize the use of these kit lenses in order to get high quality photographs like when using more expensive lenses? Of course first you must understand the differences between these kit lenses and its more expensive counterparts.
Cheap kit lenses usually have these weaknesses:
– The material of the lens is relatively poor in quality, especially its casings. Therefore, these lenses aren’t very durable so they have to be well tended to.
– The sped of the Auto Focus is not very fast, especially when targeting moving objects.
– Have a relatively small maximum aperture, and the more the zoom, the smaller the aperture. For example, a kit may have f/3.5-5.6, while the more expensive lenses have a wider aperture of f/4, f/2.8, f/1.4 and so on. There is however an exception. Prime lenses (lenses with singular focal length) like the 50mm f/1.8 are quite cheap.
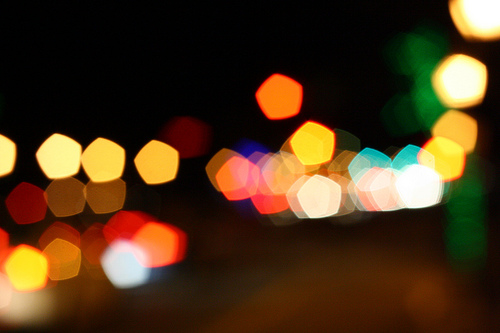
– Bokeh or background blur in the unfocussed areas aren’t rounded, but are rather pentagon or hexagon in shape. This will thereby reduce the aesthetic value.
– The pictures have weaker contrast.
– Not very sharp, especially in the corners and edges of the photograph.
– Less sharp, especially the edge/line that separates between the object and the background.
– Chromatic aberattion, vignette and flares are highly likely to occur if bright lights directly enter the lens.

– Though less apparent, there are more weaknesses.
Well yes, there are many disadvantages to the kit lens. That is why even though the price of these expensive lenses can be 10 to 15 times the price of the kit lens; photographers do not hesitate to purchase them. This especially true for those with deep pockets or is crucial to their profession.
But do not stress out yet, because I have several tips to optimizing the use of your kit lens.
1. First, I propose you take photos using aperture one or two stops above the maximum aperture setting to get the sweet spot of the lens. For instance, if your lens’ aperture has a maximum of f/3.5 or 5.6, get used to using f/5.6 at a wide zoom (around 18-24 mm) and around f/8-f/11 for zooms of around 50-55 mm. Usually with this setting, your results will appear far sharper. This principle also applies to high quality lenses.
2. In addition, it is best to not use the widest or most telephoto zoom setting of your lens as your focal length. What I mean by this is, avoid using 18mm or 55mm except for dire circumstances. It’s best if the focal lengths in between are used, such as around 24-40mm.
3. Then, to overcome vignetting and edges that loses sharpness, leave a space on the edges of the frame to crop out later during post-processing on the computer. This is especially true when photographing a scenery where sharpness of the overall photograph is important.
4. To reduce lens flare, the most important thing is to avoid directly photographing bright lights. In addition, using a lens hood can also help, especially when the lights are coming from the sides. Sometimes when you use a filter, lens flare can also happen because of the reflection on the filter glass. So be very careful when using a lens filter.
5. Because the construction of the casing is mostly made out of plastic, neither waterproof, impact proof, nor dust proof; it is best to use these kit lenses with caution. The littlest shift in the internal optical elements can significantly reduce image quality.
6. To overcome lack of contrast, you can now easily adjust the settings of the DSLR body. These settings are toggled in the picture style or picture control. You can also increase color saturation and contrast in the post-editing process using a photo editing software such as Photoshop or Lightroom.
So those are some tips you can follow to at least obtain results that come close to high-end lens results.
You may wonder, if you use a small aperture, then how can you get a good photo in an indoor or dark setting?
The answer is that this is the limitation of the kit lens. I myself suggest the use of a tripod, a flash ( built-in or external) combines with high ISO of around 400-1200 and low shutter speeds of 1/30 or 1/5 if the lens has an image stabilizer feature.
Practice the above tips and see if the results get better. If you have any other tips you would like to share, feel free to write on the comments below.


