When photographing a model or a product and you feel like there are certain parts of the object that doesn’t seem to be well-lit by the main sources of light, you can use a reflector to (obviously) reflect light to fill in any shadowy areas.
There are two general types of reflectors:
– Natural reflectors.
Reflectors from the surrounding environment.
For example: White sand reflecting sunlight; sunlight reflected on sea water, ponds or lakes; white walls of a building.
-Artificial reflectors.
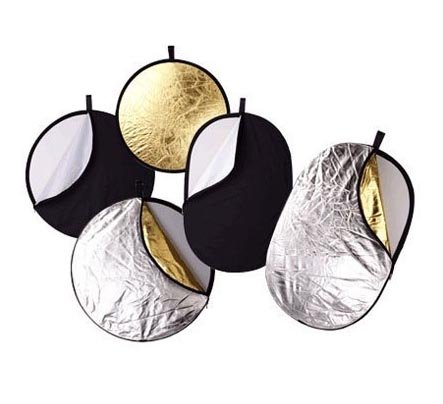
Man-made reflectors especially manufactured for use by photographers.
These artificial reflectors are categorized into 3 types or surface colors:
-Gold-colored Reflectors
Usually used to give a warmer glow on human skin tones.
-Silver-colored Reflectors
Usually for brightening shadowy areas of the model or object, making it appear whiter or a stronger brighter tone.
-White-colored Reflectors
Usually made out of Styrofoam material, giving a naturally lighter glow that’s softer and even.
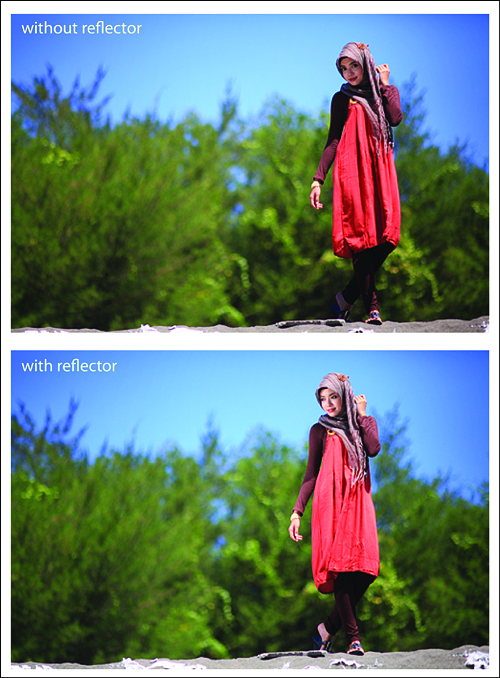
In addition to outdoor photography use, reflectors have several advantages over external flashes or additional lighting.
Some of these advantages include:
1.Considerably cheaper than external flash or mobilight.
2.Saves energy, because it doesn’t need to consume any sort of electrical power.
3.Gives out a more natural tone that can easily be adjusted to the color ambiance of the shoot.
4.Gives a softer lighting effect to the object.
The only disadvantage of using a reflector is that if the light source that you’re using to reflect upon is not strong enough, the reflector won’t do its job properly. For instance, such a case arise when you’re photographing outdoor on a cloudy day.
How To Use A Reflector In Outdoor Photography by GregHeltonPhoto


