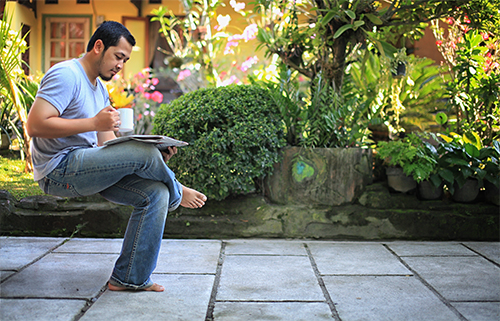
Levitation is a currently trending style of photography, one of the pioneers being the Japanese photographer Natsumi Hayashi. The technique is really quite simple. All you need is jump up, and have the photograph taken as the subject is in mid air. Besides the jump style, what must be paid attention to is the expression on the subject’s face. Here is an easier way to achieve a levitation photograph using the help of Adobe Photoshop, while having your feet on the ground. This photoshop technique is also known as the montage technique.
What you’ll need are: a camera, a tripod, a shutter release controller, a chair, and the Adobe Photoshop software.
1. First, find an interesting backdrop to your photo; may it be indoor or outdoor.
2. Next, ready your camera mounted on a tripod. Do note that while shooting, the camera’s position can’t move an inch because otherwise it will make for an imperfect montage.
3. The camera can be set in Auto or Manual mode, as long as the lighting on the first and second pictures is the same, not over or underexposed in either one. Set the lens at manual focus so the focus won’t shift between the first and second photo.
4. Then, position the chair and compose your framing through your viewfinder. After that, toggle the focus of the lens to the chair and don’t make any adjustments to the lens afterwards for the duration of the shoot.
5. Sit on the chair, or pose any way you like on the chair and use a wireless shutter release to shoot. If one isn’t available, set the timer in your camera. Or you ask someone else to push the trigger button for you.
6. Take two photos, with the first photo containing the object/model and the second photo with just the background (sans model/object). Remember; do NOT adjust the focus on your lens.
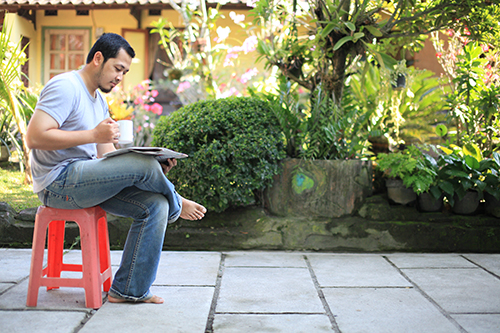
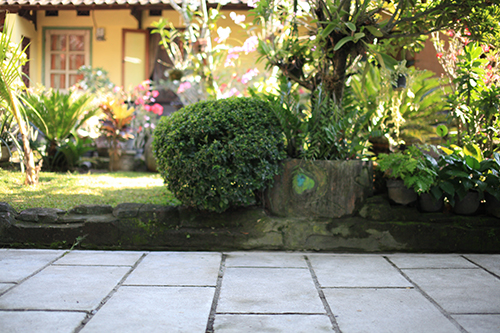
After you’re finished with your photo session, it’s now time to do some photo processing to get the effect using Adobe Photoshop. The steps are as follows:
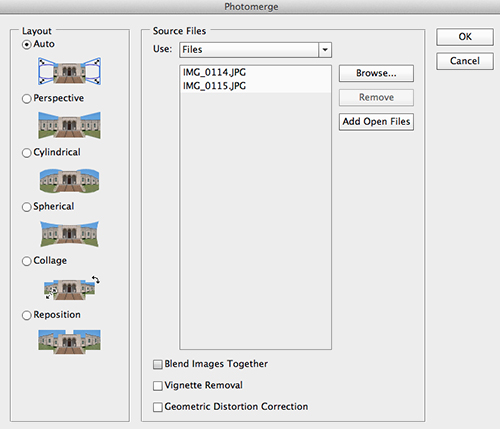
1. Click on File > Automate > Photomerge
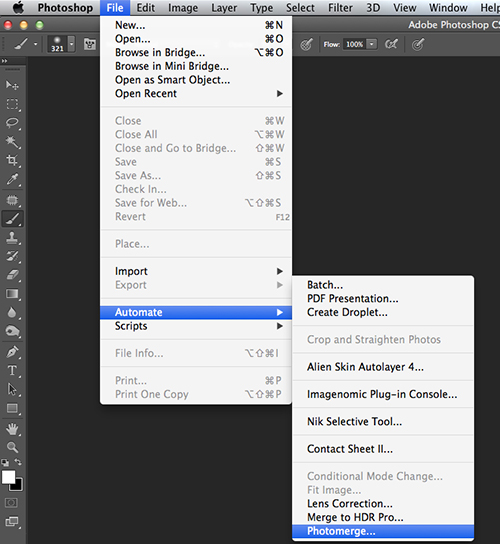
2. Click Browse and choose the two photos you’d like to merge. In the Layout column, choose the Auto option and untick the “Blend Images Together,” “Vignette Removal,” and “Geometric Distortion Correction” options at the bottom of the windows. After that, click OK.
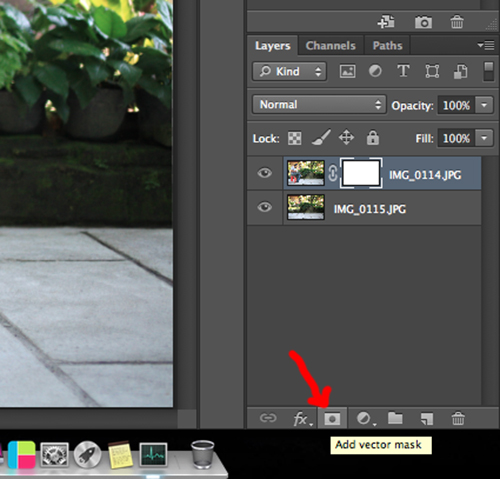
3. Next, add a vector mask on Layer 1. Direct your cursor to Layer 1, and then click “Add Vector Mask” located on the bottom right side of the screen.
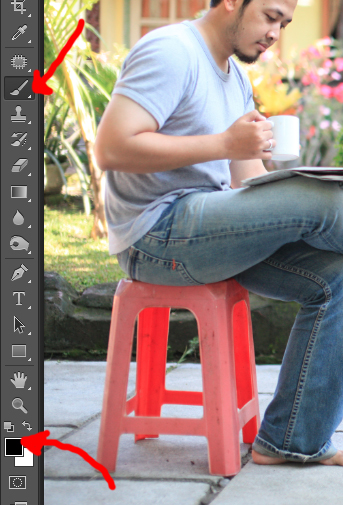
4. Choose the Brush tool and set the “Foreground Color” to Black.
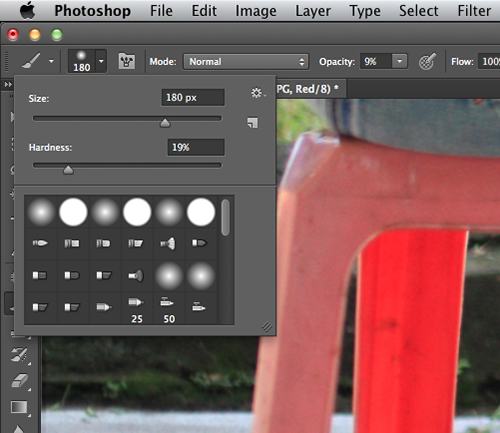
5. Set the Size and Hardness brush to ease your masking.
6. Carefully brush over the chair in the photo to remove the existence of the chair from your photo. Use the smaller sized Brush to brush over the tiny details that intersect with the object’s borders.
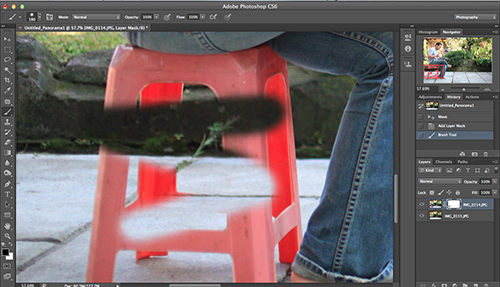
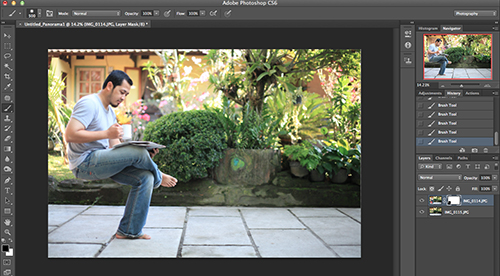
7. After the masking process is complete, the results will be as such:
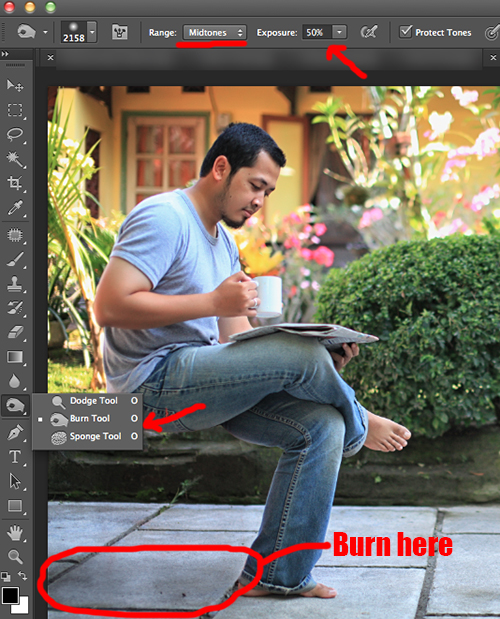
8. Add a bit of shadows so the levitation looks natural by choosing the Burn tool. Choose the Midtone in the range and select an exposure level that suits your photo. Brush over the areas under the object where you want the shadow to appear, using the set Burn tool.
9. And voila! You’ll be able to fool the world with the results! This step-by-step tutorial really isn’t detailed, but I’m sure even beginners can achieve this in photoshop if you follow the steps carefully. This is pretty much a very basic montage trick in Photoshop. Do give it a shot!


