Have you ever experienced finding a difficulty determining the exposure when the light is a bit “tricky” or too many variations between bright and dark areas while taking your shots? One way to deal with it is by using the manual setting on the camera exposure control and then you may take some shots to do some testing. Well, this trial and errors will rise another problem which deals with timing and if you shoot in changing conditions (like when you shoot sunset with light that keep changing from time to time), you will indeed, lost the right “moment” while finding the right setting. That is why you can use “Auto Bracketing” feature on your camera.
Auto Exposure Bracketing
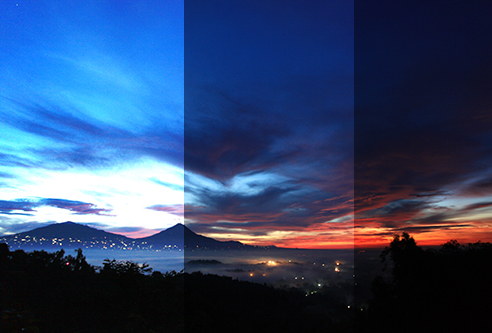
This is one of photo-shooting techniques used in order to anticipate complex lighting situation. Technically, camera can take the right composure based on the camera’s light meter and take some additional exposures like over exposed and under-exposed. By taking those exposures altogether, the possibilities of obtaining photos with precise exposure is higher.
When we shoot critical or important moments (for example, wedding) in tricky lighting situations, use bracketing in order to reduce the risk of missing important shots with the right exposures. And so is when you want to shoot for HDR, use bracketing to get photos of the same object with different exposures, so you can combine both to obtain HDR photos.
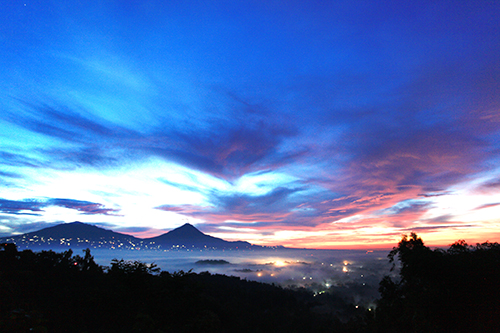
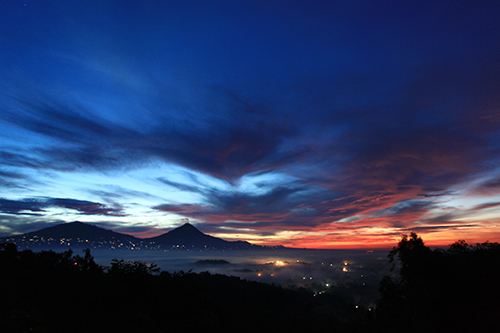
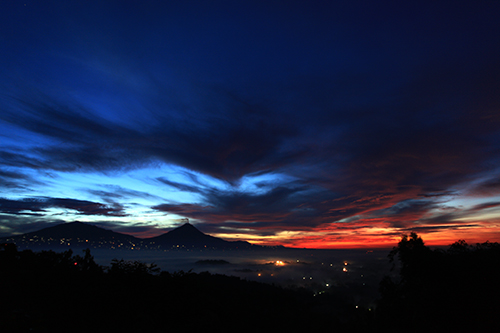
The Steps to Set Bracketing on DSLR Nikon Camera
If you use Nikon camera, you can follow the following steps:
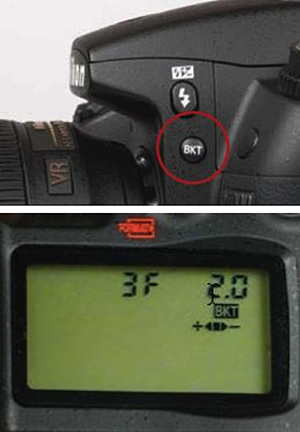
1. Find the bracketing button (BKT) at the right side of the flash button, above the lens.
2. Then, while pressing the BKT button, turn the command dial (the swivel wheel at the back top part on the right side of the camera) until the screen above showing 3F notification (meaning 3 exposures or 3 photos in one bracketing)
1. If you apply on Single Shot mode, you have to press shutter button 3 times on every single exposure. And if your camera is in Continuous Shot mode, you have to press and hold out the shutter button instead and your camera will take all three exposures altogether.
2. For the other Nikons (like D300/D300S/D700), find “Fn” button at the bottom right of the lens, turn the main command dial at the back of it to determine the frame’s numbers and the front command dial to decide on the exposure range.
The Steps to Set Bracketing For Canon Camera
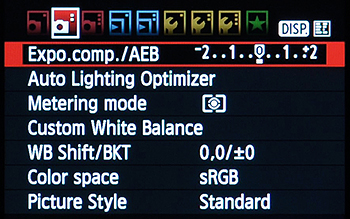
Here, we’ll take canon camera EOS 60D/50D/7D for the example:
1. Go to menu, and then find Shooting 2, look at the first entry: Expo. Comp. /AEB.
2. Select the menu.
3. Turn the main dial in order to pick the right bracketing range.
4. Press SET button.
OK…have a nice try


