For those of you who are still learning photography, have you ever been puzzled as to why your photos didn’t turn out sharp even though you’ve bought a high-tech camera with an expensive lens and settings that you feel was right for the shot? Or why when you’ve used a tripod, the photo still looks blurry? Maybe the following can be possible solutions that can fix your results.
Causes of lack of sharpness in photos include:
1.Shutter speed that’s too slow.
An important rule or when you’re holding a camera is to never use a shutter speed setting slower than 1/focal length. If you’re photographing using a 50mm lens, it’s best if you use a shutter speed of 1/60 or more. And even then, you should always have a steady hold on the camera.
The longer the focal length of a lens, the faster the shutter speed should be. When using a 200mm lens, you’ll need to at least use a speed of 1/250 second. Telephoto lens doesn’t only zoom in on an object, they also make blurs more apparent. Having an IS or VR lens also helps.
2.Pay attention to the movement of the subject.
The previous rule applies if you’re photographing a stationary object and you as the photography stays still. If the object in question has movement, like a moving car or a bird in light, or if you’re photographing while on the move, any shutter speed will render your photos blurry.
In such situations, you’ll need a different technique. You can use the panning technique or you can use a flash to help freeze the movement of your object.

3.Photographing wide open.
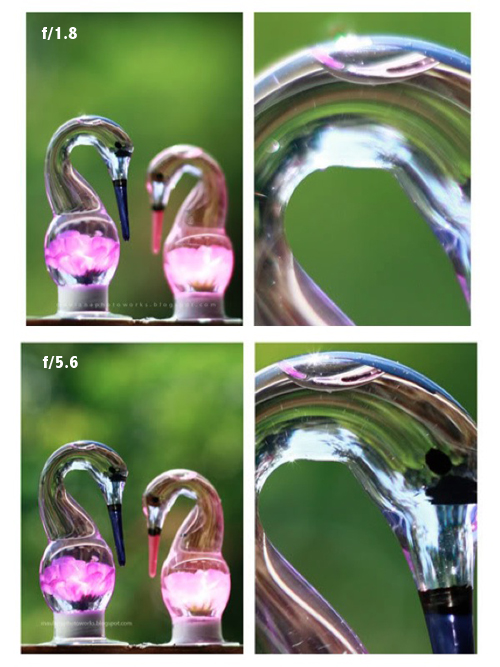
Photographing using lenses like the 50mm f/1.8 will create creamy bokeh affect. But the problem is, lenses have a physical weakness where they’re unable to produce super sharp images when used in their widest aperture. Also, wider aperture lenses have a weakness in dealing with color fringe. But this doesn’t mean you’ll always need to photograph in its sweet spot setting of f/4, but at the least you should up the aperture that’s one step up from its maximum (like the f/2 or f/2.8). Or you can compensate by upping the sharpness in your camera settings or editing later on using a post-processing software.

4.High ISO
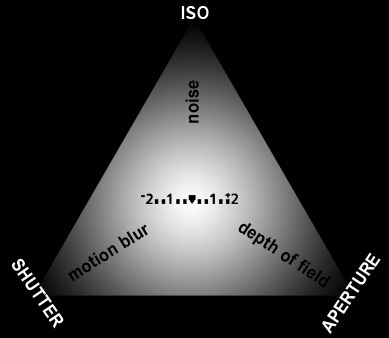
Photographing with a high ISO has the risk of producing high levels of noise. Sure, cameras nowadays, especially high-end ones, are more high-tech in dealing with noise reduction for shooting in ISO as high as 3200. But noise is still noise. Unless you’re using a high-end camera, noise will appear when you shoot using high ISO. And noise can cause loss of detail, making the photo look less sharp. Always use the lowest possible ISO you can for your given situation to ensure sharp photos. If necessary, use a tripod.
5.Image Stabilizing feature.
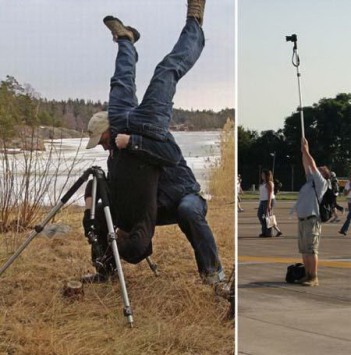
The image stabilizer feature was created to lessen hand tremors when shooting that can cause blurs in slow shutter speeds. What you have to keep in mind Is that image stabilizers only work optimally in hand-held shooting. If you’re using a tripod to photograph, turn off this feature. Having the IS feature turned on will backfire and cause your photo to lack sharpness instead.
6.Back/front focus of the lens.
Back/front focus on a lens is a weakness where the lens can’t lock focus on the predetermined focus point. This defect can occur due to lack of good quality control by the manufacturer. It can also occur due to a fall or because of the age of the lens. For mid-level to high-end cameras, there’s usually a micro adjustment feature for recalibration of back/front focus. But if your camera isn’t equipped with the feature, you may need to take your lens to a service center.
7.Mildew, dirt, or scratches on the lens.
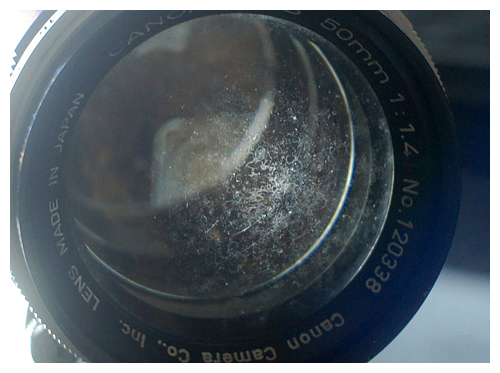
If you have problems when photographing in super bright areas and your photos turn out “dreamy” or foggy, try checking the surface of your lens. If you see finger prints on there, try cleaning it with a lens tissue.
If this doesn’t solve the problem, examine the inside of your lens. If you see spots with fibers, then your lens has been inflicted with mildew. To clean off mildew, you’ll have to take your lens to a professional service center.
It’s a different story if your lens is scratched. Scratches on a lens is almost impossible to get rid of. Scratches are most apparent when photographing a bright light sources (like a lamp).

8.Quality of light.
There is a sharpness where it’s really sharp, and there’s a sharpness where it looks sharp. Photographing in the right contrast will make your photos look sharp, with good lights and darks, achieved by photographing in good quality of light. Trying photographing in flat lighting with low contrast and your photograph will appear to be lacking sharpness. It may technically be sharp, but not so visually. So find conditions where your photos will have a good contrast definition.
If you’re still not satisfied with your results and need more info about image sharpness, this other article may also help.
Tips for Creating Sharp Photographs


