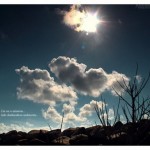
There are often times circumstances where interesting objects have to be photographed in low light conditions and a flash device is undesired (if possible). Yet, a sharp resulting photograph is still the goal. Objects such as a clear nighttime view of a city, evening music concerts, or a party’s atmosphere is a shame to pass by without being recorded by a camera.
The following are tips to keep producing optimally sharp photographs in low light conditions:
1. Tripod. The most reliable and easy-to-use tool to use is the tripod.
2. If tripod is unavailable, keep the camera steady by using anything in the surrounding environment. For example, you can keep the camera steady by leaning against a wall, holding your breath when pressing trigger button, or placing camera on flat surface.
3. Use the widest aperture possible. If the lens has a maximum aperture of f/2.8, then use the f/2.8 setting.
4. If the above maneuvers still result in shaky photographs, increase the ISO of the camera until you reach at least a shutter speed of 1/30s to 1/60s (several new generation cameras can be set to ISOs above 1000 and still result in low noise images).
5. When executing point 4, it is advisable to activate the High ISO Noise Reduction feature of the camera to decrease visible noise.
6. Or you can pass on the 5th tip by utilizing noise reduction softwares to reduce noise during the post production process. Softwares like Noise Ninja, Imagenoic Noiseware or Nik’s Dfine are powerful tools to tame any prominent noise in the resulting photograph.
7. If at all possible, use lenses with an Image Stabilizer feature. Or, for Olympus brand cameras, this feature is available on the camera body.