In photography and image processing, color balance is the global adjustment of the intensities of the colors (typically red, green, and blue primary colors). An important goal of this adjustment is to render specific colors – particularly neutral colors – correctly; hence, the general method is sometimes called gray balance, neutral balance, or white balance. Color balance changes the overall mixture of colors in an image and is used for color correction; generalized versions of color balance are used to get colors other than neutrals to also appear correct or pleasing.
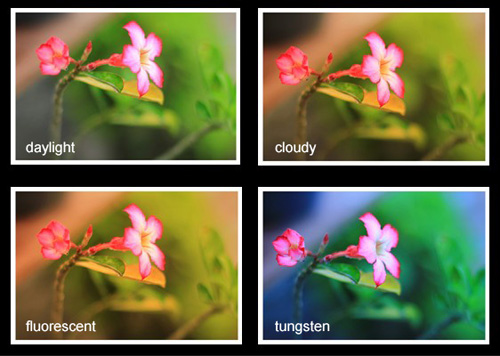
You can check white balance by looking at a captured image on the camera’s monitor. If you examine the images closely you may notice that white areas in particular have some color cast to them. (You may want to zoom the image so you can see enlarged details more clearly). To remove color casts and capture images with colors that look like they were shot at midday, we use the camera’s white balance system. This system automatically or manually adjusts the image so colors are captured the way we see them regardless of the light illuminating them. For example, the fluorescent setting compensates for the greenish light from fluorescent lamps and the tungsten setting compensates for the warmer, more reddish color of tungsten lights.
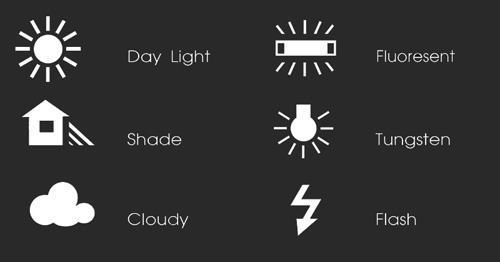
Many digital cameras offer a number of white balance settings, some for specific lighting situations.
When to use Auto white balance: In auto, the camera guesses what white balance to use depending on the available light. In 95% of the time, the guess results in a nicely colored photograph. This is a perfect setting for times when you’re unsure what white balance to choose. It’s also a good idea to keep the camera on Auto white balance if you shoot in RAW format (recommended).

Daylight (Canon) and Direct Sunlight (Nikon): This is a good setting for direct sunlight. For example, a beach landscape mid morning where you’re not shooting into shade.
When to use Shade white balance: Use shade white balance in shady area’s or sunset shots. It will help give a warmer color to your shots.
When to use Cloudy: This is a good setting for cloudy days. It’s also quite effective for shady area’s as well. I’ve found there is a fine line between shade and cloudy white balance settings.
When to use Tungsten white balance: This is one of the most extreme balance settings of them all and should only be used with tungsten light bulbs. Or at times where you purposefully want a blue tinge to your images.
When to use fluorescent: This setting will help make inside flourescent house lighting, look a bit better than the yellowy orange color you usually see.
Flash white balance: Flash white balance is used mostly for studio work.
Custom (Canon) and Preset (Nikon) white balance settings: Use these ones with a white or grey card that you can pick up cheaply from any camera store, for perfect white balance.
Doesn’t auto white balance fix this problem?
Not always. While it’s true many improvements have been made in todays digital camera’s, they still often get white balance settings wrong in certain lighting conditions. If you take your images in RAW format (highly recommended) then sure, go ahead and use auto white balance. If the camera gets it wrong, you can always change this setting later on in your RAW editor.


